How to make a snow globe
It is the beginning of December and now people are starting to decorate for Christmas. I know it is still early to fully decorate for Christmas now so today we are going to make a Christmas snow globe! There are many ways to make it but,this is the easiest way that I found to make it. Lets get started!Snow globes are magical, whimsical, and fun. And they’re super easy to make at home.
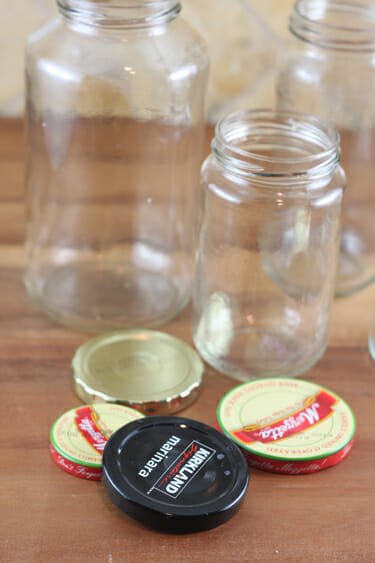
 The first thing you need are jars, with nice snug lids. Check out
your fridge; I grabbed an almost empty bottle of peperoncini peppers . I also had a bottle of capers, and a big jar from marinara. Marinated artichoke heart jars work really great for these, as do little teeny tiny baby food jars. Really any size jar works; you just have to find things to fit inside of them.
The first thing you need are jars, with nice snug lids. Check out
your fridge; I grabbed an almost empty bottle of peperoncini peppers . I also had a bottle of capers, and a big jar from marinara. Marinated artichoke heart jars work really great for these, as do little teeny tiny baby food jars. Really any size jar works; you just have to find things to fit inside of them.You can be creative with the items that go inside your snow globe, it’s just important that they are made of materials that won’t break down in water. Think plastic, ceramic, etc. If you’re not sure, just try placing the items in a bowl of water for a few hours and see if they start doing weird things. Try thrift and craft stores for little winter-themed figurines.
 Another really fun thing is to make your own little figurines with Sculpey Clay.
You can buy all different colors at almost any craft store and it just
bakes in the oven. A snowman would be super easy to make! I snipped
all of my greenery off of artificial garlands I have around my house.
Another really fun thing is to make your own little figurines with Sculpey Clay.
You can buy all different colors at almost any craft store and it just
bakes in the oven. A snowman would be super easy to make! I snipped
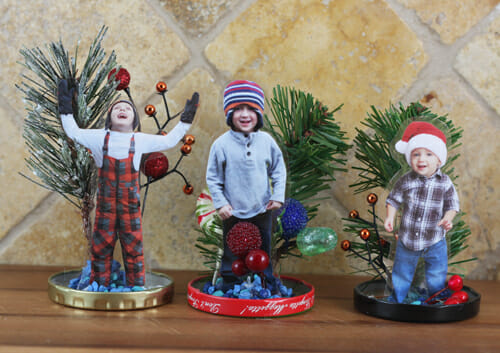
all of my greenery off of artificial garlands I have around my house.I decided to take it up a notch though, and put something extra special inside. I can’t tell you how much I love it when I have an idea in my head and it actually works like I thought it would! I just took a photo of each kiddo, printed it out on my home printer, cut it out, and ran it through my laminator .If you don’t have a laminator, most copy stores have lamination services that don’t cost much. Make sure when you cut around your lamination, you leave a tiny border so it stays sealed up.
 You will create your scene on the underside of the jar lid.
I just use plain ol’ hot glue. You might want to take a piece of sand
paper and rough up the inside of the jar lid so the glue adheres better.
I didn’t do that with this batch and everything has stayed put just
fine, but something you can try. If you have things with wide, flat
bases, they’re easy to just glue right on. But if you have something
like my little plastic pictures, or a tree sprig with a tiny twig at the
bottom, I’ve found that it’s easier for me if I have something like
little rocks (those blue things you see in the photos; they’re aquarium
rocks from the pet store that I had from another project) to help keep
things in place. It will make sense when you do it, but basically you
can pile some glue down there, put your object in, and then mound some
pebbles around it to adhere everything together as the glue dries.
 It’s just important to remember to keep things away from the edges enough that you can still screw the lid onto the jar, so don’t fill the entire base with glue or rocks. When everything is dry turn it upside down and shake it a few times to make sure nothing falls off!
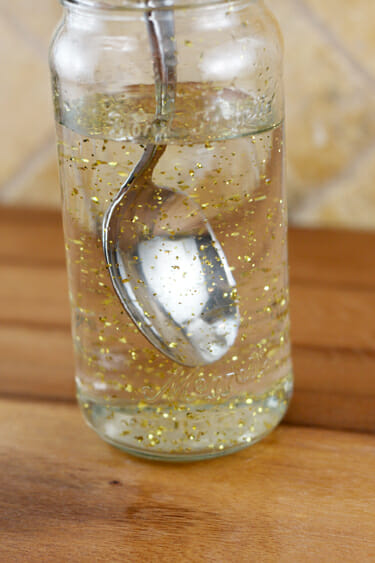
 The next step is filling up your jar with water, almost to the very
top and dumping in a bunch of glitter. I recommend adding a little more
glitter than you think you need, especially if you have greenery
because some of it will get stuck in there.
The next step is filling up your jar with water, almost to the very
top and dumping in a bunch of glitter. I recommend adding a little more
glitter than you think you need, especially if you have greenery
because some of it will get stuck in there.One thing you can do is add some glycerin, which makes the glitter float down a little slower than it does in plain water. (Or that baby oil accomplishes the same thing. You can also find snow globe “snow” at some craft stores.) Glycerin can be found in the baking aisle of craft supply stores in small bottles. If you have some already, or find it easily, you can try that out. I did a side by side test and found that it didn’t make a huge difference, unless I added quite a bit. Probably at least 2-3 teaspoons per cup of water.
 You know the Wilton gel colors we use in everything? Well if those
get dried out, you can add glycerin to them to restore the consistency.
You can also add it to homemade soap bubbles to make the bubbles
stronger. I’ve heard you can also buy it at drug stores, often near the
first aid supplies. Isn’t it kind of interesting when things can be
found in both the cake decorating and first aid aisles??
Didn’t know that, but I read it on the internet, and if there’s one
thing we all should know by now it is that everything on the internet is
true. The internet is also where I discovered that if you have some
benzoic acid laying around, you can make your own snow.
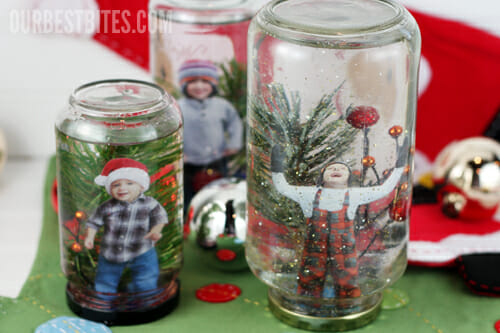
  Anyhoo…just carefully squish your stuff in the jar as you put the lid
on and tighten it. You can put hot glue on the edge of the jar if
you’re want to seal it up. Or you could put some colored electrical
tape around the edge of the jar. I left mine un-glued (and I strongly
suggest you do, at least at first) in case I had to
open them up to fix anything, or store them without water until next
year, or change the water if it got cloudy, etc. I found out that one
of my little red berries was painted and turned the entire snow globe
pink so I was glad they weren’t glued shut and I could just snip it out
and re-fill it. My jars haven’t leaked. I do flip them over sometimes
and set them lid-side-up just in case. Either way it’s best to display
them somewhere that won’t be damaged if a little water leaks out.
 You can also paint your lids if you want to cover up the labels on
them. I’m much too lazy for paint. (But not too lazy to laminate my
children and put them in winter scenes inside of snow globes. It’s all
about priorities, people.)
You can also paint your lids if you want to cover up the labels on
them. I’m much too lazy for paint. (But not too lazy to laminate my
children and put them in winter scenes inside of snow globes. It’s all
about priorities, people.)I got this from:http://www.ourbestbites.com/2011/12/how-to-make-a-homemade-snow-globe/
Hey guys! Tell me if anyone enjoyed this craft and if they are going to try it!
ReplyDelete