Friday, February 15, 2013
Friday, February 8, 2013
DIY Valentine's Day Jewelry Holder
DIY Valentine's Day Jewelry Holder
This craft makes a great gift for anyone and a great regular decoration.Also,if anyone tried out this craft then let me know in the comment section.I hope that everyone will enjoy this craft! :)
Tuesday, January 29, 2013
How to make a Paper Curls Valentine's Day Wreath
I know that it is not Valentine's Day yet but,lets get into that Valentine's Day spirit.Isn't everyone excited!Today I decided that since Friday is February 1st I will be doing some Valentine's Day posts.The wreath that we will be making looks hard but,after you start doing it,you will realize that this craft is simple and it also looks nice.You can hang it anywhere you want it to be and it will bring some Valentine's Day spirit to your home.Now lets get started!
Paper Curls Valentine Wreath
Supplies:
- 1x6-inch paper strips
- pencil
- hot-glue gun
- 8-inch foam wreath form
- liquid adhesive
- glitter
2.Glue the end of each curl into a loop.
3. Hot-glue the paper to an 8-inch foam wreath form. Repeat until the form is covered.
4. Lightly brush liquid adhesive over the paper curls, and sprinkle with glitter.
I got this craft from:http://www.bhg.com/holidays/valentines-day/decorating/hand-crafted-valentines-day-decor/#page=1
Thursday, January 24, 2013
Duct Tape


Supplies and Tools
• Duct tape (pink, white)• Stuffing (Bubble Wrap brand packing material, polyfill, or cotton)
• Scissors

Step 1
Take your desired size of duct tape and connect your strips of duct tape together.Cover the back side also so it is not sticky. 
Step 2
Draw or trace a heart on the duct tape fabric.
Step 3
Cut out the heart.
Step 4
Repeat steps 1-3 so you have two identical hearts.
Step 5
Place the hearts on top of each other and attach
with small pieces of duct tape. Be sure to leave about 3 inches open
for stuffing the heart.
Step 6
Fill the heart with stuffing.
Step 7
Finish closing up the heart with small pieces of duct tape.Enjoy your duct tape heart!I got some of this information from:http://www.duckbrand.com/Duck%20Tape%20Club/ducktivities/holiday-crafts/duct-tape-heart

Thursday, January 17, 2013
A Super simple Way To Do Colorful 3D Art
 Since there is a lot of cool street art I thought that I can do something simpler and recreate some kind of 3D figure! Looking at some 3D picture or art looks like it is very complicated to do. But, it is actually pretty easy. I find that 3D art can be inspiring to do more 3D things that you thought you can never draw before. Doing 3D art is super simple by following these steps:
Materials:
- drawing paper
- magic marker or a sharpie
- colored pencils
- pencil
- Put your hand on the paper and trace the outline of it very lightly so it won't be noticed too much.
- Draw horizontal lines on your paper in magic marker or a sharpie. The lines should be drawn straight outside of the outline of your hand and curved inside the outline. This will make it look like your hand is popping out of the paper.
- Use the colored pencils to color in the lines but don't color the same color in a row or else your drawing will not look as that good and pop out like 3D!
Wednesday, January 9, 2013
How to make a Snowflake
So, now it is a new year. There has not been much snow yet or not at all depending on where you live. So, today we are going to make our own ''snow''. We are going to make paper snowflakes! I hope that these paper snowflakes will bring out the Winter in January. So, lets get started!
Materials:
--White Construction Paper
--Scissors
 Step 1. Fold your paper down to a corner and cut the excess rectangle off.
Step 2. After you cut the excess paper fold your paper in half so it looks like a smaller triangle.


Step 3. Cut your pattern on the sides of your triangle but try not to cut too much or else your snowflake will fall apart.

I got some of this info from:http://www.instructables.com/id/How-to-make-a-paper-snowflake-1/#step1
Thursday, December 20, 2012
Christmas
Christmas
I know that the upcoming holiday,Christmas is coming but,do you know what it actually means? Do you think that it is a time of just getting presents or do you even know the story behind it? Maybe...not. So, I will share with you the true meaning of Christmas.What do you celebrate Christmas for? People celebrate Christmas to remember the birth of Jesus. People don't know the precise birth of Jesus but, every year Christmas is still celebrated on December 25. Christmas is celebrated all around the world and is celebrated by an increasing number of non-Christians. Not everyone celebrates Christmas because of their nationality.

 What is the story of Christmas? It is also known as the Nativity Story. There was a woman named Mary, and God was sending her a baby and she was supposed to name him Jesus. Mary was supposed to take Joseph as her husband also. There were three kings and they knew that there was going to be a new king born (that would be Jesus) soon. So, the king of Mary and Joseph's city heard about a king being born and demanded the husband of each wife to go to their hometown where they were born to do a census. Joseph was born in Bethlehem so Mary and Joseph had to travel there.Mary was already pregnant with Jesus so they took the families donkey and set off to their journey. It was a long journey and while they were on it the three kings were following the star to find Jesus. After a few days Mary and Joseph reached Bethlehem and Jesus was born in an animal stable. The three kings reached their destination and found Jesus at the stable and gave him three gifts. An angel came to some shepherds and told them that a king was born in the stable close by and the shepherds came to see Jesus also.
 What kind of traditions do people have for Christmas? Many people have different traditions for Christmas. But, Christmas is about giving and sharing. So, during Christmastime people buy a Christmas tree and give each other presents. That is the usual Christmas tradition. People also decorate with a bunch of lights outside on their house.
Now to end this post I am going to show you how to make a Gum Drop Garland! This craft is pretty easy but, you have to be careful to not prick yourself with the sewing needle. The last post I did was How to make a Gum Drop Pomander Ornament so this year if you do both of the crafts then you will be the Gum Drop house this year! Lets get started!
Gum Drop Garland {Tutorial}
 I adore how my Gum Drop Garland turned out. It is soooo easy and fast and just adorable. See?
And it cost me only $1.00!!
My gum drop garland is wrapped around a grapevine tree in my “collected” foyer. However, you can use a gum drop garland anywhere your sweet, big heart pleases. I thought it also would be cute to make little strung ornaments out of 3-4 gum drops.
Anyway, on to the tutorial…

Supplies Needed:
- Gum Drops 1.00/bag at the Dollar Store
- Scissors
- Upholstery Thread or Fishing Line
- Long Needle
- Damp Rag to wipe off your sticky fingers and needle.
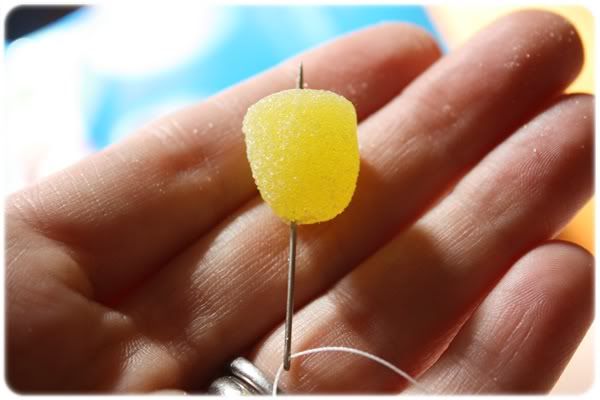 Cut a piece of thread as long as you want your garland. I cut mine around 4 feet long. Knot the end. Then begin threading on gum drops. I alternated colors and the direction of the gumdrops as you can see in the first picture.
 After several gum drops your needle, thread and fingers will begin getting sticky. Just wipe them off and keep at it!
Or, I guess you could lick your fingers if you’d like! 

Looking a.d.o.r.a.b.l.e!!!
Once you’ve finished threading the gum drops, knot the thread and cut off any excess. Then have fun decorating with this whimsical gum drop garland!
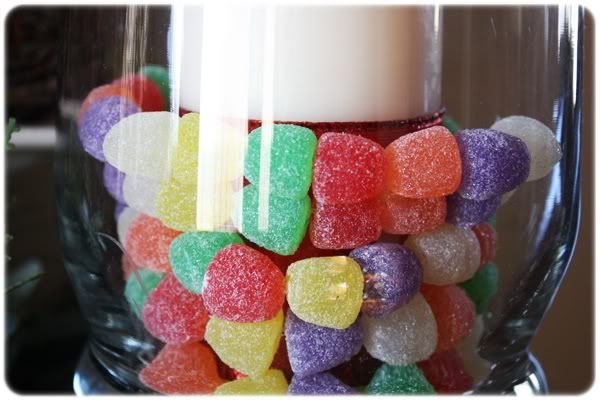
…add it to a candle holder…

…or drape it over a mirror…
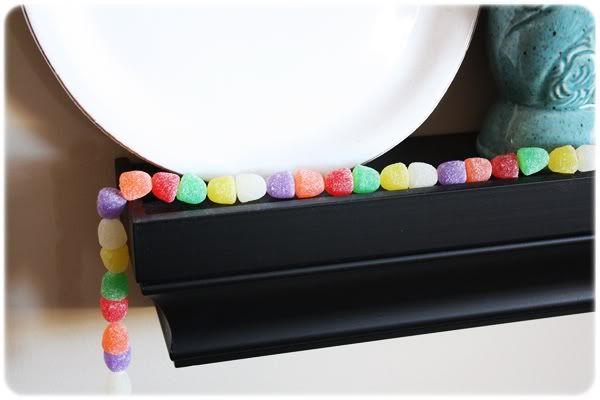
…hang it from a shelf…
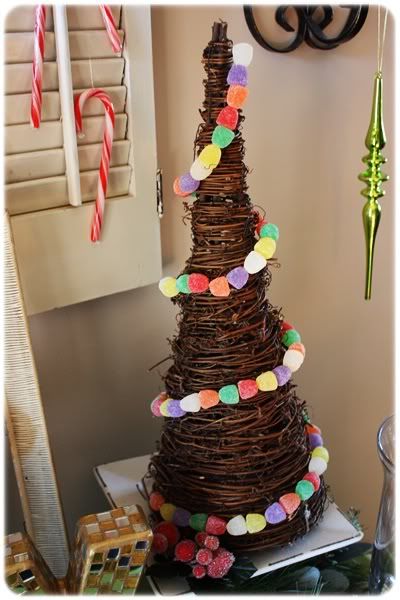
…or wrap a grapevine wreath with it like I did in my foyer…

So there you have it…how to make a fun, frugal and whimsical gum drop garland. As always, please use discretion where you place your garland if you have little children.
P.S. I’ve had my gum drop garland made and in my foyer for two weeks and I haven’t had any issues with bugs!
Are y’all ready for Christmas?
I got this from:http://myblessedlife.net/2010/12/whimsical-gum-drop-garland-tutorial.html
Subscribe to:
Posts (Atom)